Debit & Credit User Guide
How to Import Files
Step 1. Open the File
To import a file in macOS, click on the "File" menu in the menu bar and select "Import". Alternatively, you can drag a file into the app icon in the Dock.
To import a file in iOS, open the app settings, select "Import / Export", select "Import" and select a file for import. Alternatively, you can open a file in any other app and send it to Debit & Credit using the "Share" function.
Step 2. Assign Table Columns (CSV Files Only)
This step is applicable to CSV files only. You will be asked to assign columns located in the file to the corresponding values (e.g. date, amount, description, etc). You will need to at least assign the date and amount columns. Other columns are optional.
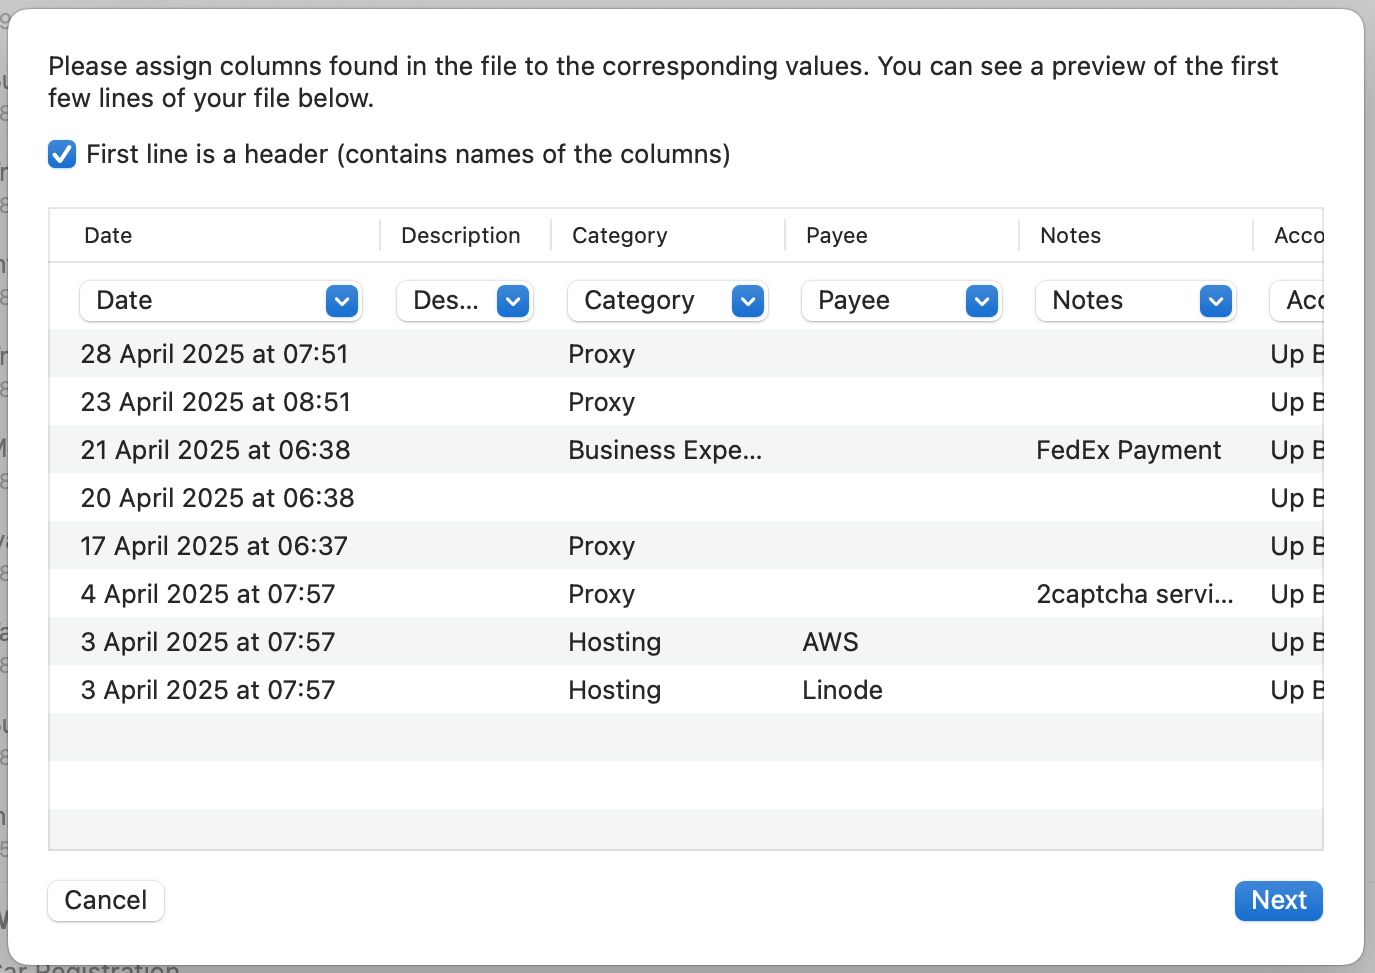
Some CSV files have separate columns for positive (income) and negative (expense) amounts. In this case, please make sure that you select "Amount (Expense)" and "Amount (Income)" values for these columns. In all other cases, please use a single "Amount" value.
Step 3. Match Values Found in the File to the Values in Your Database
You will be asked to match values that were recognized for different attributes (e.g. account, description, category) to the existing values in the app. Accounts, categories, payees and tags can be created on import if needed.
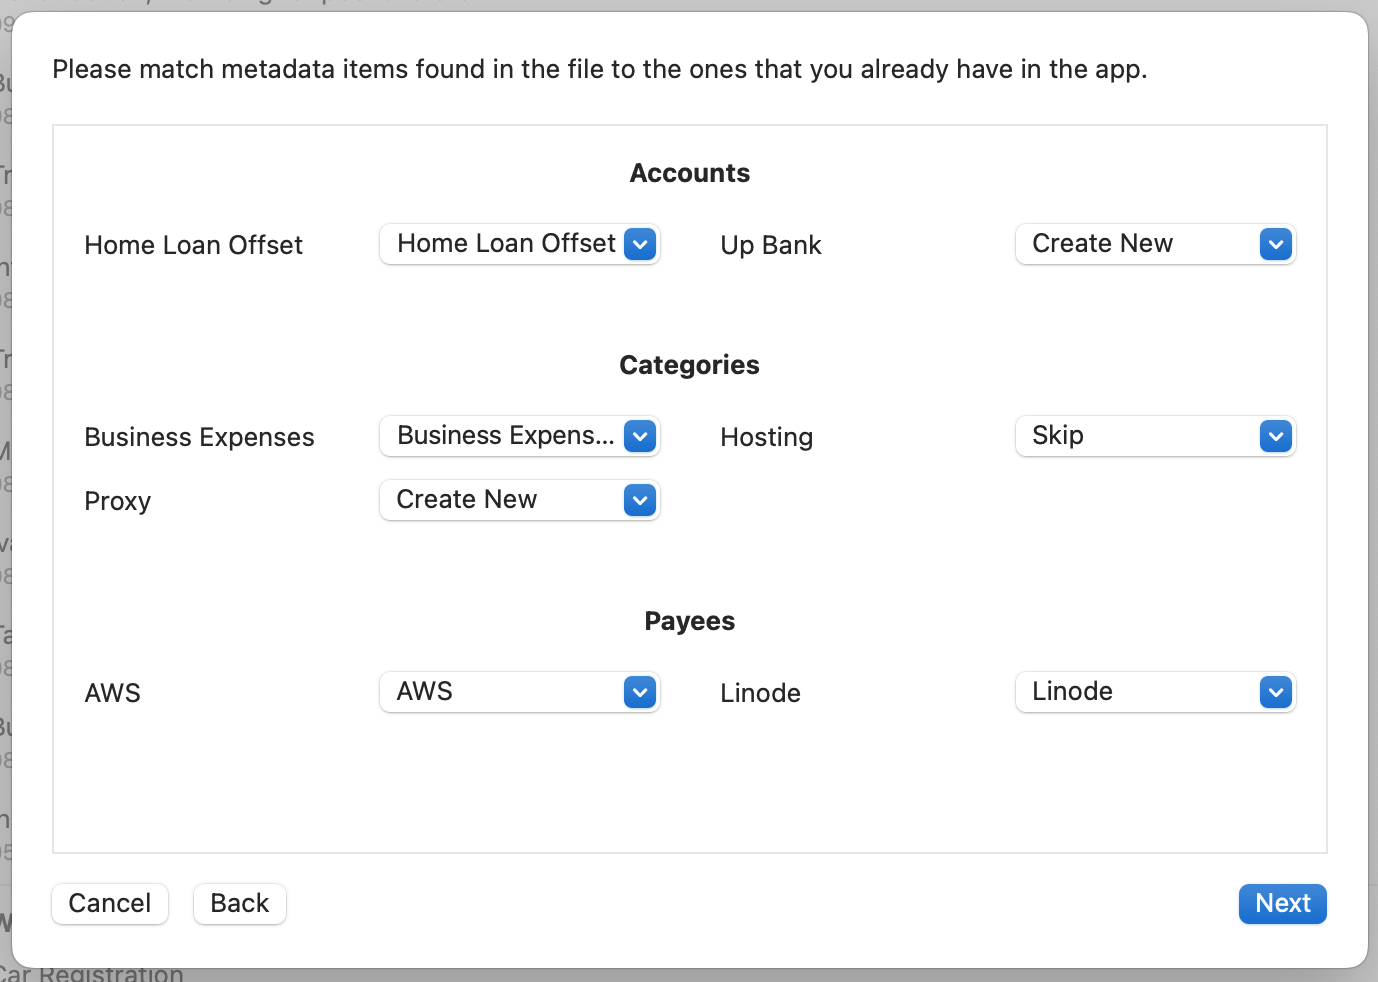
In case if you are importing a file with transactions for a single account that could not be identified from the file, you will be asked to specify it (you will be asked to select "Import Account").
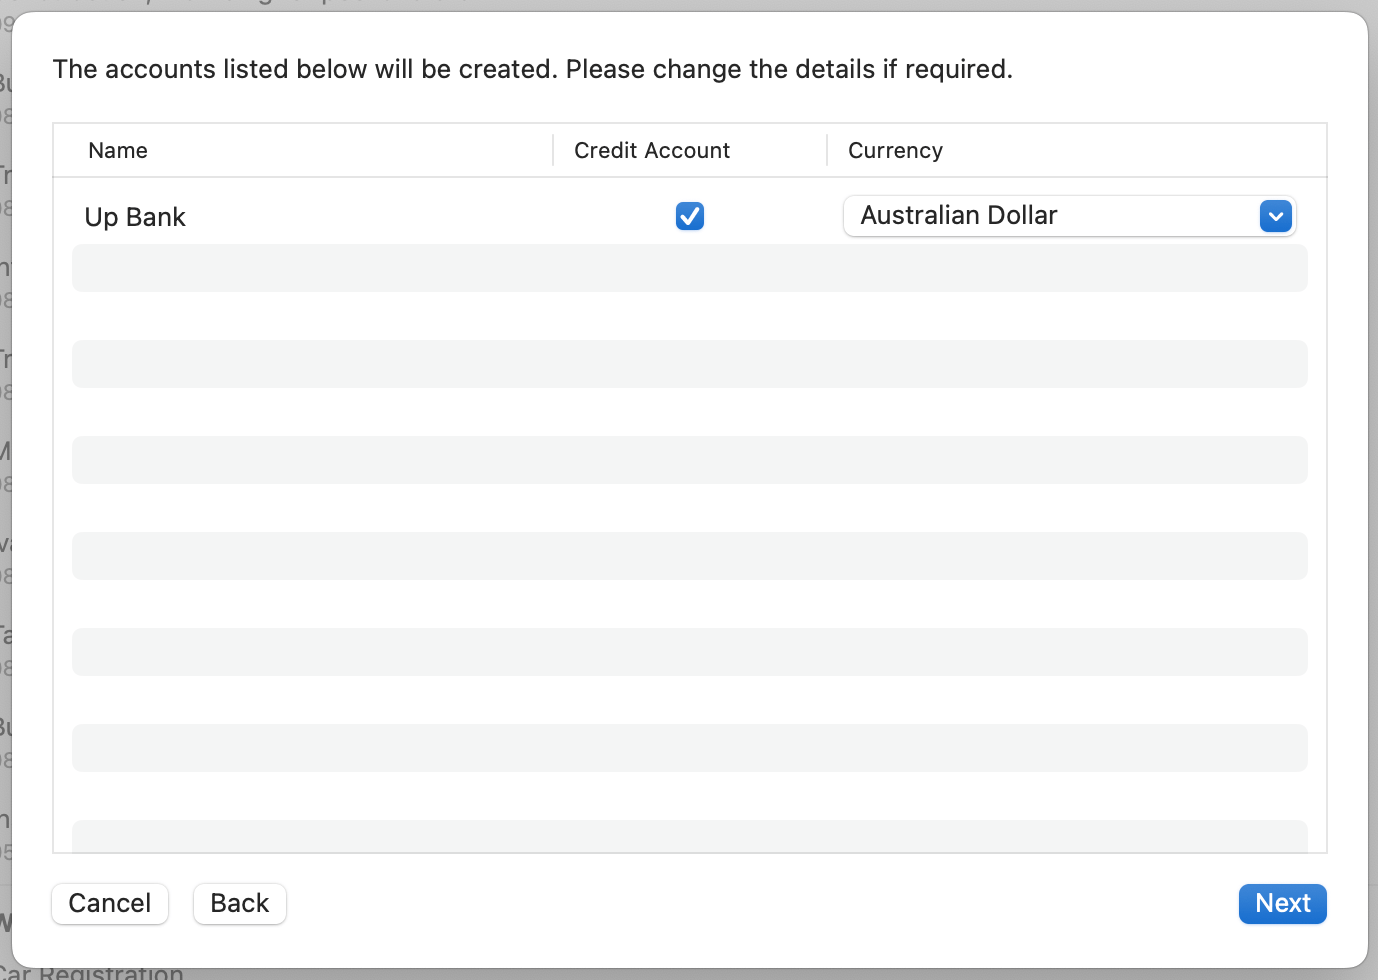
Step 4. Provide New Account Details (Optional)
If at the previous step you have selected "Create New" for any of the accounts in your file, you will be presented with a list of accounts to create. You can change account currency and select if it is a credit account.
Step 5. Select Transactions to Import
The app will present you with a list of transactions to be imported. Debit & Credit will do its best to recognize transactions that were previously recorded in the app and will uncheck them by default.
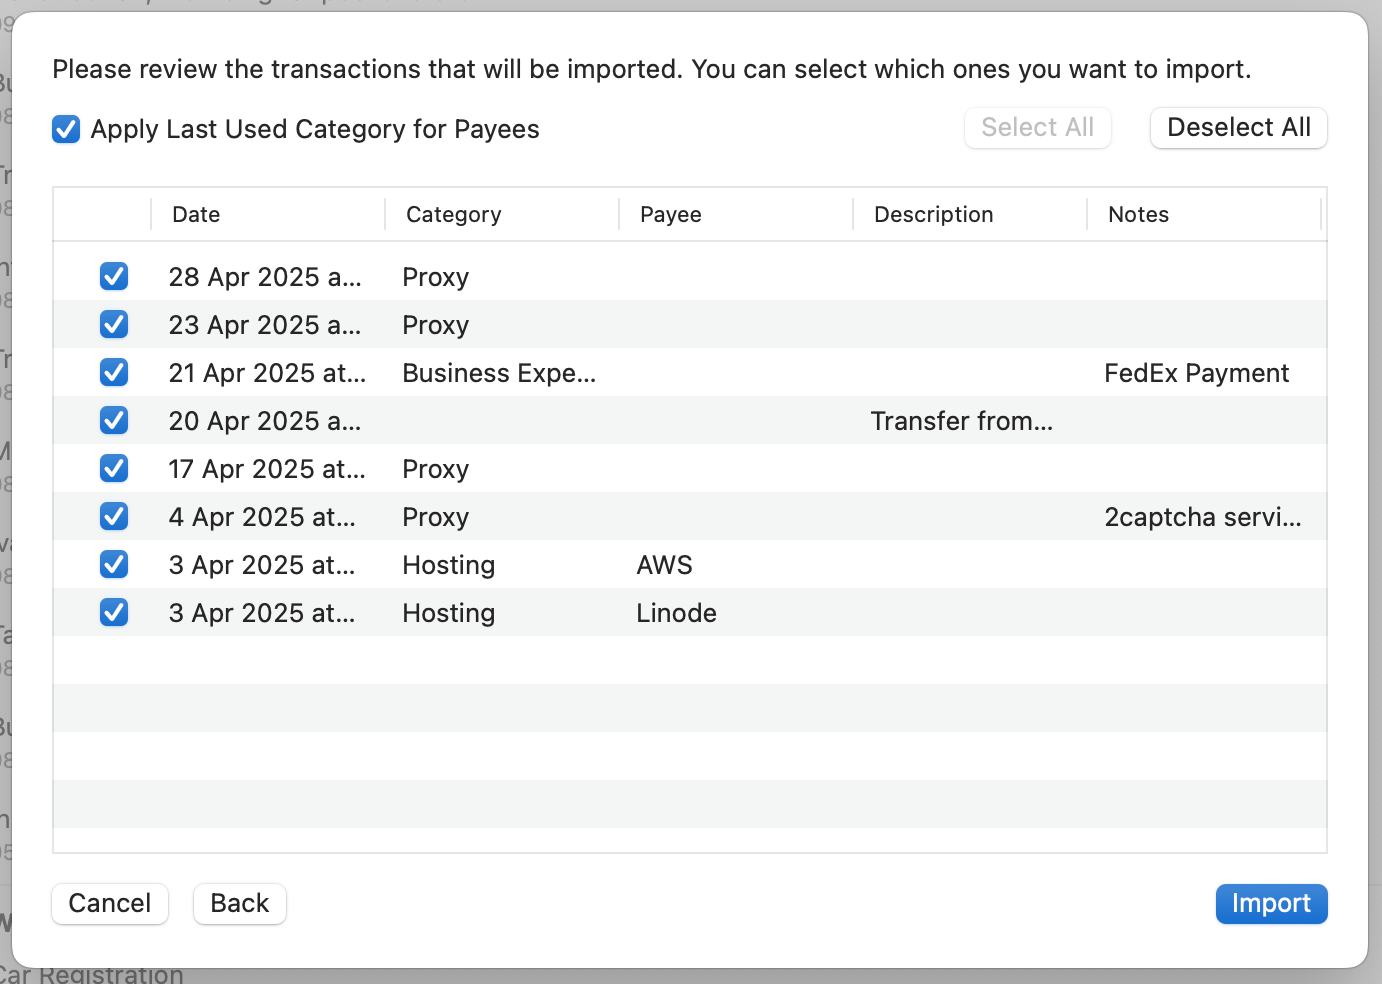
After that the app will import selected transactions.
Related topics: categorisation of transactions on import, how to convert imported transactions into transfers, advanced features of the app.